How to Securely Forward Logs Using Fluentd
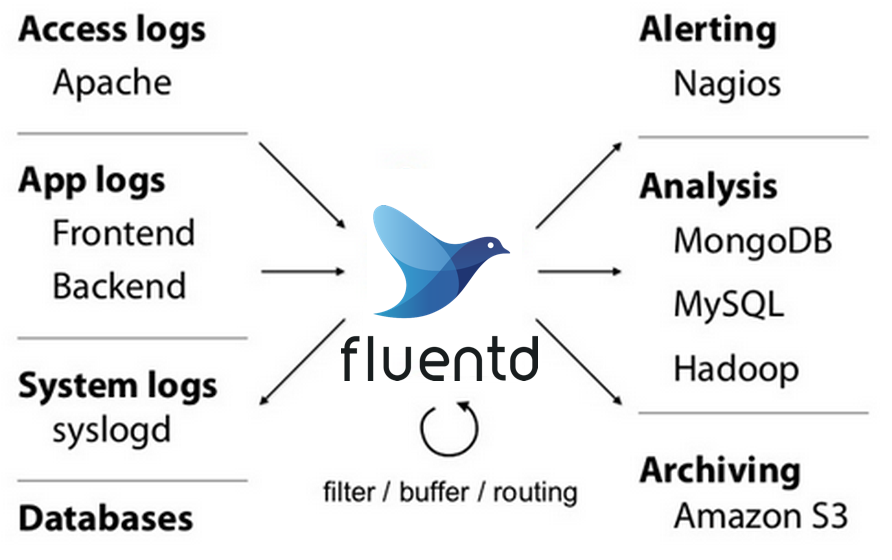
Fluentd is a unified data collector for logging. It allows you to collect logs from wide variety of sources and save them to different places like S3, mongodb etc. It is fairly lightweight and integration to any app should be easy.
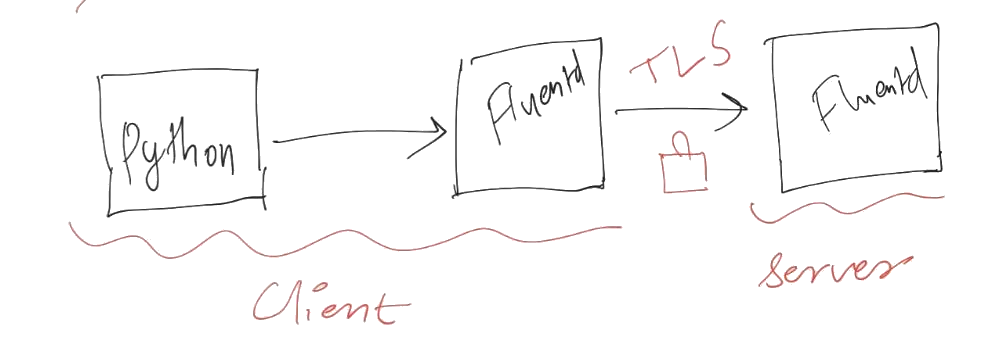
In this post, let’s see how to spin up a fluent servers using docker and forward logs from one fluent server to another. We’ll push the logs using fluent-logger python package. As we care about security, we’ll setup TLS encryption and authentication.
Complete code is available on github.
Spin up fluentd servers
Let’s quickly spin up client and server fluentd servers using docker-compose. Keep the following text in docker-compose.yml
version: "3"
services:
  clientfluent:
    image: fluent/fluentd
    volumes:
      - ./client_fluentd.conf:/fluentd/etc/fluent.conf
    ports:
      - 24224:24224
  serverfluent:
    image: fluent/fluentd
    volumes:
      - ./server_fluentd.conf:/fluentd/etc/fluent.conf
And following text in both client_fluentd.conf and server_fluentd.conf:
<source>
  @type forward
  port 24224
  bind 0.0.0.0
</source>

<match *.*>
  @type stdout
</match>
What this config does is very simple: both client and server fluentds listen to port number 24224 and print the logs (to stdout). Start the containers using:
$ docker-compose up
Let’s send a simple log push from python using fluent-logger. Install the package using pip install fluent-logger. Keep the following code in test_fluent.py:
from fluent import sender
logger = sender.FluentSender('app', host='localhost', port=24224)
logger.emit('follow', {'from': 'userA', 'to': 'userB'})
Run this using
$ python test_fluent.py
You should following line in the docker-compose’s logs:
clientfluent_1 | 2020-11-24 11:19:17.000000000 +0000 app.follow: {"from":"userA","to":"userB"}
Forward the logs
Let’s forward the logs from client fluentd to server fluentd. We’ll make client fluent print the logs and forward. We just have to modify <match *.*> section in client_fluentd.conf:
<match *.*>
  @type copy
  <store>
    @type stdout
  </store>
  <store>
    @type forward
    <server>
      host serverfluent
      port 24224
    </server>
  </store>
</match>
Notice how serverfluent is used as host name. This works because docker-compose sets up common network between different containers and allows service names to be used as host names. Kill the previous server and use it again:
$ docker-compose up
And in a different terminal do
$ python test_fluent.py
You should see the log in both clienfluent and serverfluent. Note that there will be a time delay because fluent uses buffering.
clientfluent_1  | 2020-11-27 06:14:12.000000000 +0000 app.follow: {"from":"userA","to":"userB"}
serverfluent_1  | 2020-11-27 06:13:58.189592100 +0000 fluent.info: {"worker":0,"message":"fluentd worker is now running worker=0"}
serverfluent_1  | 2020-11-27 06:14:12.000000000 +0000 app.follow: {"from":"userA","to":"userB"}
Security
What about security. What if clientfluent connects to serverfluent over internet? Right now there’s no encryption nor authentication of the communication between the fluentds. Encryption is when the communication is not readable by a third party. Authentication is when you have to limit communication to certain trusted parties. Note how these are two distinct concepts. For example, https is all about encryption while your login to facebook or google is about authentication. We want to setup both encryption like https (called TLS) and password based authentication.
Let’s start with encryption. Create certificate and private key for TLS encryption. You’ll be prompted for a password. I used sasank for illustrative purposes. Use a better password.
$ openssl req -new -x509 -sha256 -days 1095 -newkey rsa:2048 \
              -keyout fluentd.key -out fluentd.crt
Generating a RSA private key
..+++++
............+++++
writing new private key to 'fluentd.key'
Enter PEM pass phrase:
Verifying - Enter PEM pass phrase:
-----
You are about to be asked to enter information that will be incorporated
into your certificate request.
What you are about to enter is what is called a Distinguished Name or a DN.
There are quite a few fields but you can leave some blank
For some fields there will be a default value,
If you enter '.', the field will be left blank.
-----
Country Name (2 letter code) [AU]:
State or Province Name (full name) [Some-State]:
Locality Name (eg, city) []:
Organization Name (eg, company) [Internet Widgits Pty Ltd]:
Organizational Unit Name (eg, section) []:
Common Name (e.g. server FQDN or YOUR name) []:
Email Address []:
Set permission to the generated certificate and key:
chmod 700 fluentd.crt
chmod 400 fluentd.key
We want to mount these files to the docker container. Add the following lines to volume section of serverfluent service.
- ./fluentd.crt:/etc/certs/fluentd.crt
- ./fluentd.key:/etc/certs/fluentd.key
And add the following configuration to server_fluentd.conf
<source>
  @type forward
  port 24224
  bind 0.0.0.0
  <transport tls>
    cert_path /etc/certs/fluentd.crt
    private_key_path /etc/certs/fluentd.key
    private_key_passphrase sasank
  </transport>
</source>

<match *.*>
  @type stdout
</match>
That’s it our target fluent is now TLS ready. Now let’s configure clientfluent to send TLS encrypted data. Since we generated self-signed certificate we have to mount it to our client fluent docker. Make sure following line is present in volumes section of clientfluent docker compose.
- ./fluentd.crt:/etc/certs/fluentd.crt
Now adjust the configuration of source fluent: client_fluentd.conf
<source>
  @type forward
  port 24224
  bind 0.0.0.0
</source>

<match *.*>
  @type copy
  <store>
    @type stdout
  </store>
  <store>
    @type forward
    transport tls
    tls_cert_path /etc/certs/fluentd.crt
    tls_verify_hostname false  # Set false to ignore cert hostname.
    <server>
      host serverfluent
      port 24224
    </server>
  </store>
</match>
That’s it! We’ve setup TLS encryption for all packets being sent from clientfluent to serverfluent. Note that this is not authentication. We need to setup a password so that only people with that password are able to send logs to serverfluent.
Just add the following lines to @forward section of source and target respectively
<security>
    self_hostname clientfluent
    shared_key my_secure_password
</security>
<security>
    self_hostname serverfluent
    shared_key my_secure_password
</security>
Of course, replace my_secure_password with a secure password you can share to the client.
Let’s test the setup.
docker-compose up
and
python test_fluent.py
You should see:
clientfluent_1  | 2020-11-27 06:49:08.000000000 +0000 app.follow: {"from":"userA","to":"userB"}
serverfluent_1  | 2020-11-27 06:49:06.928711600 +0000 fluent.info: {"worker":0,"message":"fluentd worker is now running worker=0"}
serverfluent_1  | 2020-11-27 06:49:08.000000000 +0000 app.follow: {"from":"userA","to":"userB"}
That’s it! We’re done. The logs are forwarded securely over TCP. Now you’re good to deploy a server fluent on AWS somewhere and client fluent on an edge device!